Showing posts with label recipes. Show all posts

Wednesday, October 12, 2011

Easy Peasy Candy Corn Treat

It's my turn to cook lunch for the teachers at the preschool today and one of my tasks is dessert.  I almost went to my faithful Texas Sheet Cake (yum!) but thought it would be fun to try an easy candy corn treat instead.  I make a Christmas treat we call Reindeer Food that uses almond bark, pretzles, chex cereal or Cheerios, and red and green M&M's.  I was wondering if I could do a variation of that with candy corn since we're lovers of anything that combines sweet and salty.


I started with these ingredients but I also had Cheerios at the ready.  I melted the almond bark in my large saucepan.  You have to do this over low heat, stirring constantly so it doesn't scorch.  I forgot to take a pic of this step {bad blogger!}.

When it's all melted, remove it from the heat and dump in the pretzles and candy corn.


And stir like crazy until everything is coated!!  I used both bags in their entirety.  I didn't add the Cheerios, though I could have thrown in a cup or so in hindsight.

Then I dumped the whole thing out on my kitchen island that was covered with wax paper.  This is the easiest way for it to harden, and you just throw the paper away when you're done.


Sorry for the blurry photo!  I was trying to multitask before my treat hardened! :)


Here it is, spread out in all its glory. :)  NOTE:  do not leave unattended!!  Every time I walked by, I noticed another little piece gone.  The male teens and the hubs were "sampling" every time I turned my back!!

Once it's hardened, you can break it into serving size chunks.


Can I just say YUMMY!!!


Ready to serve it up!  Hope my fellow teachers like it.  It's sweet and salty yumminess IMO!

Since I pulled it together, I've found a few variations of this treat floating around the blogosphere... I may have to try all of them!
Linking Up!! Photobucket


Blue Cricket Design's Show and Tell
Somewhat Simple

Transformation Thursday


Happy Decorating!


Friday, September 23, 2011

{A} is for Apple :)

Happy Friday and Happy Fall, y'all! For some reason this week seemed odd and off a bit to me... barometric pressure? the moon?  onset of the autumnal equinox?  Not sure, but we made it to the end-- woo hoo!

If you've been a reader for a while, you know that my "day" job is a preschool teacher, which means I get to finger paint, sing, act silly, memorize Bible verses, teach phonics, and come up with all kinds of fun projects to keep my 4 year old sweeties engaged and learning.  This week we were reviewing the vowels and digging into our unit on apples, so we made Apple Pizzas.

They turned out sooooo yummy and were such a piece of cake to make hit, I thought I'd share.  You can make this more complicated from scratch if you like.  I kept it simple so the kiddos could participate. The whole school smelled good, too, while they were baking. :)


What You Need:
  • can of refrigerated biscuits
  • aluminum foil covered cookie sheet or jelly roll pan, lightly greased
  • applesauce or grated fresh apples (can you guess which one I used?)
  • cinnamon sugar for sprinkling
What You Do:
  • Preheat oven according to biscuit package directions.
  • Lay biscuits out onto foil-covered cookie sheet.  We wrote their names in Sharpie beside each biscuit.
  • Press the individual biscuits, flattening out to about 1/2 to 2/3 inch thick (the children can do this).
  • Spread a layer of applesauce on top of the biscuit (the children did this with the backs of spoons).
  • Sprinkle cinnamon sugar generously on top. :)
  • Bake biscuits according to directions, plus a minute or two.  The edges should be golden.  The center will seem a little doughy to the touch because of the applesauce, but it will be done.
  • Let cool a bit and enjoy!
These make a yummy breakfast treat or snack.  You're welcome! 

Today I'm perusing one of my favorite home stores for more fall inspiration.  I'll share with you next week, just in case you haven't found your autumn chi yet.

Linking up!

Join  us Saturdays at tatertotsandjello.com for the weekend wrap 
 up           party!


Have a great weekend. :)

Friday, September 9, 2011

Easy Peasy Fall Supper {Omelet in a Bag}

My crew loves to have breakfast for supper and this summer, my mom introduced us to a fun supper that will become our new fall staple: Omelet in a Bag.  The best part?  The kids {or your guests} get to assemble it!

What you need:
  • 2 eggs per person
  • 1 gallon sized ziploc bag per person
  • your family's favorite omelet fixin's {cheese, ham, chicken, veggies, etc}
  • large stockpot, filled 3/2 with water brought to a boil.

Step One:  Set out your omelet fixin's.  Our faves are bacon, ham, onion, shredded cheese, spinach, chopped fresh tomatoes, chopped green peppers.  The black olives were for Mom. :)


Step Two:  Put names on gallon-size ziploc bags.  This is so you can tell the omelets apart after they've cooked. :) Sharpie works best.


Step Three:  Each person cracks two eggs into their ziploc bag and adds their choice of fixin's.


Step Four:  Each person zips their bag shut and mushes everything together thoroughly.  The eggs need to take on a "beaten" appearance. 


Step Five:  Open one corner of the ziploc bag and squeeze as much air out of it as possible.


Here's what they look like before being plunged into a large stock pot of boiling water!


Step Six:  Drop ziploc bags into pot of boiling water and boil for EXACTLY 13 minutes.


Step Seven:  Use tongs to remove bags from water.  Pull bag open carefully (they are super hot!) and tip omelet out onto the plate.


Embellish with salt and pepper, salsa, or anything else you desire. 

We love how simple and satisfying this is!  Most of the photos I took at my mom's when she introduced us to this fun supper/brunch idea.  We've had it twice since then and everyone leaves the table happy. :)  After all, they fixed it themselves!
Linking up with:


Thursday, August 18, 2011

Yumminess {Homemade Mac n Cheese]


I confess:  I've been in a funk since I dropped My Girl off at college last week. *Sigh*  Thank goodness my teaching year gears up again on Monday to help me snap the heck out of this!

For her "last supper" at home, My Girl requested this delish mac and cheese dish that came to me from my friend Harriet. Since you busy wives and moms are readying for back-to-school and football weekends (War Eagle! Go Dawgs!), I thought I'd share it with you. It's truly a crowd pleaser and is a regular request around here.

Harriet's Mac and Cheese

1 lb rotini pasta, cooked and drained
2 eggs, beaten
2 cups shredded mozzarella cheese
4 cups shredded cheddar (or colby jack-- our fave!) cheese-- 3 c in casserole, 1 c on top
2 1/2 cups milk
3-4 tbs butter

Coat 9x13 baking dish with butter.  Add beaten eggs and milk to cooked and drained pasta.  Mix well.  Add mozzarella cheese and 3 cups of cheddar (or colby jack) to pasta mixture and stir.  Pour into dish, cover, and bake at 350 for 45 minutes.  Uncover, add remaining 1 cup cheese on top, and bake additional 15 minutes until melted.
Enjoy...


You're welcome! :)

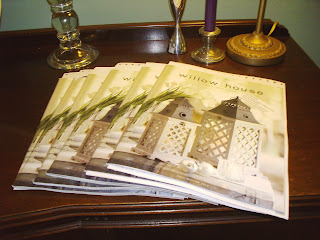
Coming soon: my Mom Cave/home office update, new Willow House decor, and a new "I Can't Resist!"


Happy Cooking!


Thursday, May 5, 2011

Mexican Crock-Pot Chicken {Cinco de Mayo Fave!}


Happy Cinco de Mayo!!  Remember the carefree days when you would leave work a little early on Cinco de Mayo, meet up with friends at your favorite Mexican haunt and sit outside enjoying margaritas, nachos, and other delectible treats? 

I don't know about you, but when the May Madness schedule hits with school age children, there is little time to sit outside anywhere and indulge in one of my favorite cuisines.  Instead, we're on the run with football banquets, end of year concerts and recitals, PTA meetings, Honors Nights, etc, etc, etc.  Can you believe I have NOT ONE "free" evening between now and May 29th?  Seriously. 

But I digress. :)  I hit upon this delicious Mexican Crock Pot Chicken recipe several years ago and it has become my go-to supper for our Cinco de Mayos (or any other night we want, for that matter!).  Someday, my husband and I will be back to meeting up at our favorite place and sitting outside with a frosty margarita, but in the meantime, this is a festive crowd pleaser that won't gum up your on-the-run May afternoons and evenings... enjoy!!


Mexican Crock-Pot Chicken Recipe

Mexican Crock-Pot Chicken

Ingredients:
3/4 cup chicken broth
1/2 cup red salsa (or green, if your family prefers) plus more for serving
1/3 cup flour
1 large onion, chopped
2 1/2 lbs boneless, skinless chicken breast halves
2/3 cup low fat sour cream
4 oz shredded cheese (we like the colby-jack, but cheddar is good too)
1 15 oz can red beans, heated (optional-- served on the side)
shredded iceberg lettuce
soft corn tortillas, warmed prior to serving

Combine broth, salsa, and flour in your slow cooker, whisking to blend.  Stir in the chopped onion and then arrange chicken breasts in the pot, smooth sides up.  Cover and cook on low for 6 hours.

Remove chicken to a plate.  Ladle sauce from the pot into a blender and puree. Stir in the sour cream and return the sauce and chicken to the pot.  Keep warm until ready to serve.

Recipe from All You April 2005.

I serve this by topping the chicken with shredded cheese and offering the beans, lettuce, chips and salsa, and tortillas on the side.  Great for left-overs (if you have any left) and letting your older children serve themselves if they're on the run like mine.

Happy Cinco de Mayo!


Friday, February 18, 2011

Crowd Pleaser Chicken Lasagna

I had a different post in mind for you today, but life got in the way, so I thought I would share a recipe with you. I made this for my fellow preschool teachers this week as we celebrated the February birthdays among us. It drew rave reviews and I ended up sharing it with several of them. This chicken lasagna is ridiculously simple and simply delicious. It's easy to prepare ahead and refrigerate and is, truly, a crowd pleaser. If I'd known I was going to share it here, I'd have photographed it's lightly browned bubbly cheese to give you some eye candy! But nonetheless, this one's a winner. Hope you enjoy!

Chicken Lasagna

Meat of one whole chicken, either boil your own or use one rotisserie chicken
3 large cans Hunts Pasta Sauce
1 tbsp Italian seasonings
3 cloves of garlic, minced
24 oz container cottage cheese (I use low fat)
2 packages frozen spinach, thawed and drained
1 egg, beaten
2 cups shredded Italian cheese mix
2 cups shredded mozzarella
1 package no-boil lasagna noodles

Pull chicken into bite sized pieces and combine with pasta sauce, Italian seasonings, and garlic in a large sauce pan. Heat through over medium heat and then let it simmer over low heat for about 20 minutes. In medium sized bowl, combine cottage cheese, spinach, the egg, and ½ cup Italian cheese mixture.
In 9x13 baking dish or lasagna pan, spread about one cup of sauce mixture. It should cover the bottom of the pan. Layer over it the no-boil lasagna noodles, making sure they do not touch each other or the sides of the pan. Break them into pieces if necessary. On top of the noodles spread 1/3 of the cottage cheese mixture. Sprinkle ½ cup of Italian cheese mixture on top. Add another layer of sauce mixture, another layer of noodles, another layer of cottage cheese mixture, and sprinkle with Italian cheese mixture. Repeat the process again, ending with the last of the Italian cheese mixture. Then sprinkle the 2 cups of shredded mozzarella on top.
Cover with foil and bake at 350 for 40 minutes. Uncover and bake another 10-15 minutes so the cheese can get slightly brown on top. Let sit for 10 minutes after removing from the oven. Then serve. Can easily be prepared and then refrigerated overnight before baking.

Coming soon: furniture makeovers, my home office redo, and more decor!

Sunday, January 23, 2011

Friday Night Hambone Soup

A brief departure from our winter decorating and my redecorranging at home to share this yummy soup with you.  I made it literally on a wing and a prayer, but it turned out so wonderfully I couldn't keep it to myself!  I had a hambone with a little meat left on it leftover from last weekend, so I pulled it out of the freezer and got busy.

Hambone Soup

1 hambone, with some meat left on it
1 carton reduced sodium chicken broth
6 cups of water
1 small onion, coarsely chopped
1 bag of baby spinach
1 can diced tomatoes, undrained
3 cloves of garlic, minced

In large stockpot, bring hambone, chicken broth, and water to boil.  Simmer over low heat for 1 hour.  Remove hambone and chop any ham into bite size pieces.  Add onion, garlic, and tomatoes to soup stock and simmer for 20 minutes over low heat.  Add spinach and chopped ham and simmer over low heat for an additional 30 minutes.

We enjoyed this with cornbread on Friday night, and then with grilled cheese sandwiches for lunch on Saturday.  The hambone adds so much flavor, no salt and pepper necessary.  If you like heartier soups, you could add a can of northern beans, too.

Enjoy!

Friday, December 24, 2010

Merry Christmas from Heidiopia!

I thought I'd share my mother's French Toast Casserole recipe with you today.  Mine is already chilling in the fridge for tomorrow's Christmas Day Brunch!  This is super simple and delicious...a real crowd-pleaser.

French Toast Casserole

2 tbsp corn syrup
1 stick of butter
1 cup brown sugar, firmly packed
10-12 slices of bread
5 eggs
1 1/2 cups of milk
1 tsp vanilla

Combine first 3 ingredients in small saucepan and simmer over low heat until syrupy (about 10-12 minutes).  Stir frequently while bubbling.  Pour into bottom of a 9x13 Pyrex dish.  Place bread on top (usually 2 layers).  Beat together eggs, milk, and vanilla and pour over bread.  Cover and refrigerate overnight.  Uncover and bake in pre-heated 350 degree oven for 45 minutes.  Slice into squares and serve.

Serves 8.

And, here are some of my holiday touches around Heidiopia...

My favorite new ornament this year!

Wishing you peace and prosperity this holiday season...we're on vacation next week, so I will see you back here in the New Year with more fresh ideas and some exciting giveaways in store.

Be blessed!
~Heidiopia

Wednesday, September 29, 2010

Terrific Tailgating

As a Texan AND a Southern girl, fall means football!  And football means tailgating.  Too much trouble?  No way.  Choose a few simple make-ahead recipes and combine them with items you can pick up at your grocery store, such as a platter of chicken tenders, chips, and bakery cookies.  Keep a supply of water, cups, plates and utensils on hand so you're ready to roll in a heartbeat.  A simple caddy is a great idea for keeping these items staged for game day.  Large handled baskets and tubs are a great way to transport everything and assist in the clean up, too.  Add in some inexpensive tablecloths in your team colors from your local discount store, or use your team throw for some added punch.  Bring a few serving pieces from home to add a little style such as lightweight trays, a beverage dispenser or entertaining bucket, and baskets for snacks.

Here's an easy dip recipe to get you started... now GO TEAM!

Bacon-Onion Dip
1 8 oz container of sour cream
1/2 cup cooked and crumbled bacon
2 tbsp sliced green onions
3 tbsp buttermilk
1 tbsp horseradish
2 tsp fresh lemon juice
1/4 tsp pepper
1/2 tsp salt
Garnishes: fresh chives, ground pepper

Stir together first 8 ingredients.  Cover and chill until ready to serve (up to 24 hours).  Garnish if desired.
Serve with assorted fresh vegetables.

Monday, August 16, 2010

Willow House Debut Party

I am the queen of keeping it simple when I entertain, but I always want my guests to feel special, too.  For my Willow House Debut Party,  I set up three zones.  My dining room became the bargain basement, where I was unloading gently used samples for $5, $10, or $15.  My kitchen was refreshment central while the breakfast area was a display of new Fall products.  Catalogs and order forms were in the family room where I had some low-key music playing and candles burning... great place to relax and peruse the new catalog!  I had 22 ladies that came and went, along with a couple that popped in the next day to see "what was left of the bargains."  :)

Bargains in the dining room


Margaritas made with fresh lime and Master of Mixes Low Sugar mix-- delish!  These didn't last long :)

Turkey and Swiss pinwheels from Costco, cubed cheeses with strawberries and grapes, lemon creme cake from Publix Bakery-- like I said, Keep It Simple!


Black bean and corn salsa (recipe below) with tortilla chips


Fall Display


2 bunches for $5 at WalMart... seriously.  Tie a little raffia around the stems to help them stay upright.

You can order from my party until Friday the 20th.  Visit my website, click on "Our Products" and enter my name (Heidi Milton) as hostess.  You can place your order right there.

Black Bean and Corn Salsa

1 can black beans, drained and rinsed
1 can sweet corn, drained and rinsed
2 medium plum tomatoes, chopped
1/4 cup diced sweet onion (like a Vidalia)
2 tbsp chopped jalapenos
1/4 cup chopped fresh cilantro
1/2 tsp salt (I use kosher)
1/4 tsp garlic powder
2 tbsp fresh lime juice

Combine all ingredients in large bowl, stirring thoroughly.  Cover and refrigerate at least 1 hour.  Serve with tortilla chips.
** Also a great addition to fish!